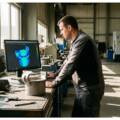
How do we do it?
You may be thinking; why would someone want to be scanned in 3D? There are many reasons for doing so. Maybe you want to print a small copy of yourself or a loved one. It has become fairly common to print people in scale for all kinds of models such as cars & trucks in 1/24th and 1/25th scale, printing people in scale for model railroads in 1:87 (HO scale) and in 1:160 (N scale), or maybe just to have a visually interesting ornament to hang on a Christmas tree. There are so many more possibilities.
When it comes to 3D scanning people, there are two main methods. The first is using a 360 degree photo/scanning booth whereby up to 100 images of a person are all captured at the same exact moment. The software then processes the photos into a full color 3D model. The second is using a handheld scanner to 3D scan a person manually. The first option is obviously the best because virtually anyone, even pets, can be captured without the challenges of merging scans which can be slightly to significantly out of geometry because people (and pets) are not inanimate. We are constantly moving, breathing alone, changes body geometry which can be challenging for the software to create a high quality 3D model.
Obviously the full scanning booth is the best option for capturing the human body. Unfortunately, these systems cost more than $30,000. More than double the cost of the Artec Eva scanner we utilize. What does this mean for you? First, we scan a person in ‘sections’. Each arm, each leg, the front of the body and back of the body, and finally the head and hair. This gives us the ability to massage the data somewhat to compensate for minor movements during the 3D scanning process. As you can see from the example above, the results are nearly lifelike.
Getting Comfortable
First, we’ll go over the basics and explain the process so you’ll know exactly what to expect and answer any questions you may have. It’s very helpful if you have an idea of how you want to pose for the scan. Once these details are reviewed, an overhead projector will be used to display the scanning process for both the scanner opperator and you as the model. You will not be always able to see the scanning in real time depending on the direction you’re facing and what part of the process is currently happening. You will be able to see the intermediate results as 3D scan data is reviewed to ensure there are no gaps in the coverage between sections.
Seven Major Steps to the Scan Process
The person performing the scan will instruct you where to stand/sit. Once in place, we’ll begin with your left foot, the scanner will run up from the floor capturing the inside of your leg and thigh, up to your waist. The scanner will move over directly in front of you and then down to the floor. Once more it will move up to your torso, capturing the outside of your foot and leg. This is the first section. This will continue until the entire leg is captured. Depending on the pose you choose and the outfit you’re wearing, it may be necessary for the operator to lay on the floor so as to scan up directly between your legs to get the details not possible from a front/rear facing scan. This can be the case if you’re standing with your feet far enough apart that there is space between your legs all the way up to your torso.
The next scan will be of your left arm and hands. Starting in front once again, the scanner will move up and down from your waist to your neck, moving angles for each pass until everything is scanned on the left side of your body. Special attention will be focused on your hands and fingers. So the operator will scan them from various angles to ensure all of the contours and texture are fully accounted for.
The process will then be repeated for the right side of your body. It’s important to remain still so as to keep the geometry of your body as close to it’s position and shape in the previous scans.
Lastly, will be your torso, abdomen, chest and neck. Then the back of your neck, upper back, shoulders & lower back.
Finally your head and face will be scanned. Depending on your height, the operator may use a small step stool to be able to scan the very top of your head.
What should you do to prepare for your scan?
There are several things you can do to make the scanning easier and more effective.
If you have long hair, either have it in a ponytail or braided. Otherwise, be prepared to put it in a ponytail before the scan. The operator will use a matte effect hairspray to keep your hair together as closely as possible and reduce the sheen.
do not wear shiny / light reflecting jewelry, belt buckles or accessories. The scanner cannot “see” these and the 3D model just ends up with a bright white ‘hole’ where the reflective object was located.
What should you wear for your scan?
The best results are achieved with clothing that fits snuggly and has very little bunching. Small changes in posture or stance will easily change the geometry of the clothing which then causes problems in post processing because the software cannot match the 3D scan layers together.
Do not wear glossy footwear. The reflected light will create ‘holes’ in the final model that have to be manually corrected.
How long does it take?
Expect to spend about 30-45 minutes for the scanning process. You won’t need to stand still for the entire session. After scanning your body, it takes several minutes to review and assemble the scans to ensure the entire area is fully captured. After the scan is complete, you can expect an email in 2-3 days with the download link to save your model to your device. The files will be in .stl and .obj format.
How much does it cost?
We charge $199 for a scan of your body from the waist up. For a full body scan, the cost is $299.
Request your scan now