
Surface Texture and Reflectivity in 3D Scanning: How to Prep Parts for Metrology-Grade Results
Surface texture and reflectivity can make or break your 3D scanning accuracy. Shiny surfaces, transparent parts, and dark materials often cause scan errors that slow your project down. Knowing how to prep these tricky surfaces can save you time and deliver metrology-grade results every time. Let’s break down practical tips to get your parts ready for precise scanning with tools like the Artec Leo and ScanTech SimScan E.
Understanding Surface Texture and Reflectivity
Delving into the world of 3D scanning, surface texture and reflectivity stand as critical factors affecting scan accuracy. Grasping their impact is key for achieving precise results.
Impact of Surface Texture on 3D Scanning Accuracy
Surface texture plays a fundamental role in 3D scanning. Smooth, even surfaces generally offer better scan results, while rough or uneven textures can lead to inaccuracies. For instance, scanning a vehicle’s body requires attention to surface quality to ensure every curve is captured. A polished texture might reflect light incorrectly, causing data loss. In contrast, a matte finish helps the scanner capture accurate details by reducing light reflection.
To illustrate, think about scanning a car hood versus a textured wall. The car hood’s smoothness can lead to errors if not prepped correctly. Addressing these surfaces with proper preparation techniques is essential for achieving accuracy.
Challenges with Reflective and Transparent Parts
Reflective and transparent parts are notoriously challenging in 3D scanning. These surfaces cause the scanner to misinterpret data, leading to incomplete scans. For example, a shiny metal piece might reflect too much light back into the scanner, creating noise in the data. Transparent objects, like glass or clear plastic, pose another problem as lasers can pass through rather than reflect back, missing crucial details.
A real-world scenario is scanning a glass vase. Without proper preparation, the scanner struggles to capture its shape accurately. Tackling these## Understanding Surface Texture and Reflectivity
When diving into the world of 3D scanning, it’s crucial to recognize how surface elements affect the process. The texture and reflectivity of your object play pivotal roles in scanning outcomes.
Impact of Surface Texture on 3D Scanning Accuracy
Surface texture can significantly influence the accuracy of your 3D scans. Smooth surfaces generally allow for more precise results, as they reflect the scanning light evenly. Uneven textures, however, can scatter light, leading to errors. For instance, if you are scanning a car part with a rough surface, the light may not reflect correctly, resulting in distorted data. The key insight here is simple: smoother textures often mean cleaner scans. Most people think rough surfaces can’t be improved, but simple prep steps can change that. Using proper surface preparation can bridge the gap between rough and smooth for better outcomes.
Challenges with Reflective and Transparent Parts
Reflective and transparent surfaces present unique challenges in 3D scanning. These types of surfaces tend to bounce the scanning laser or structured light erratically, creating false readings. If you’ve ever tried scanning a shiny metal piece or a glass item, you’ve likely encountered this issue. The longer you wait to address these challenges, the more time-consuming your projects will become. The misconception is that reflective parts can’t be scanned accurately, but with the right approach, they can be tamed.
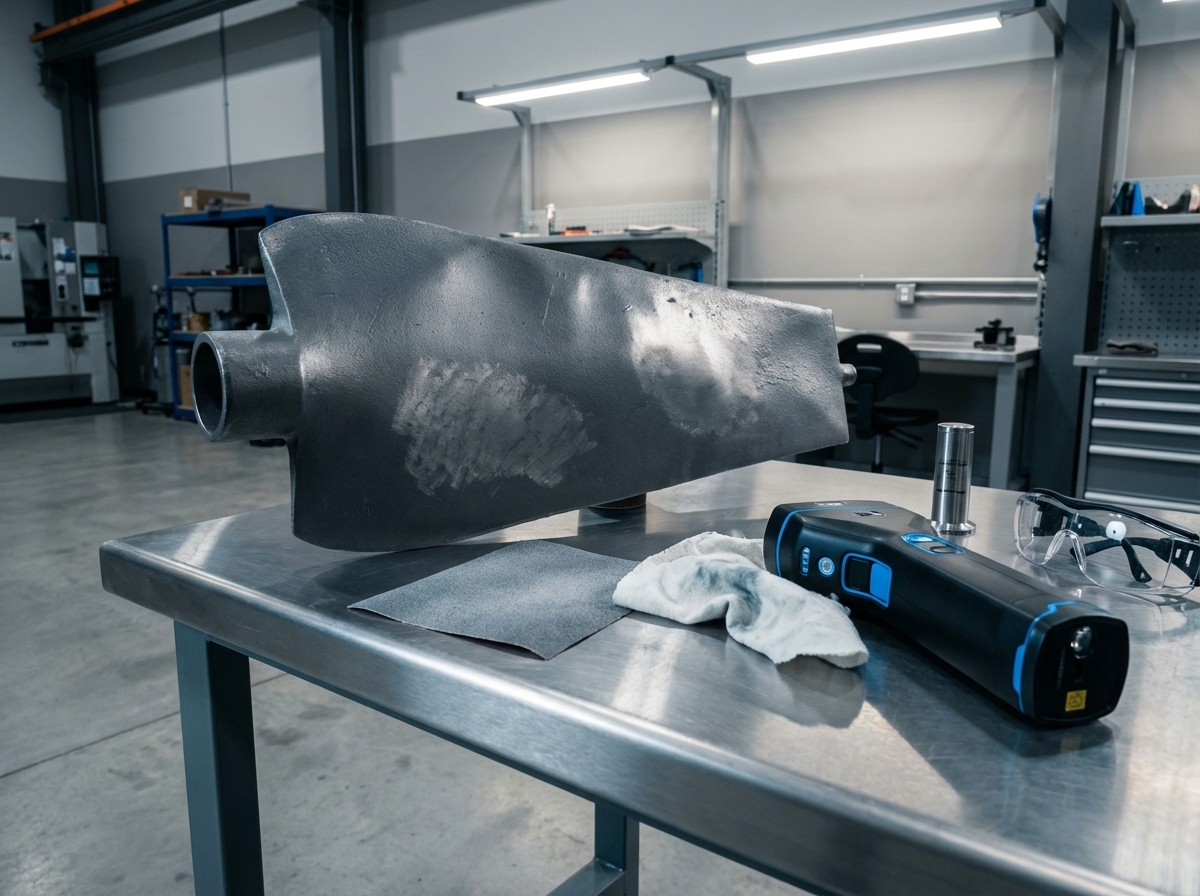
Solutions for Shiny Surfaces and Dark Materials
Luckily, solutions exist for handling shiny surfaces and dark materials. For shiny objects, applying a matte scanning spray can help reduce glare and enhance surface readability. With dark materials, the issue is often low reflectivity, which can be counteracted with a light dusting of powder spray. Here’s the key insight: proper prep can turn scanning obstacles into opportunities for precision. Most people think these problems are insurmountable, but they aren’t with the right tools.
Preparation Tips for Metrology-Grade Scans
Preparation is your best ally when it comes to achieving metrology-grade scans. By taking proactive steps, you can ensure that your scans are as accurate as possible.
Effective Use of Matte Scanning Spray and Powder Spray
Matte scanning spray is invaluable in mitigating reflectivity. A thin, even coat can make all the difference in scanning shiny objects. Similarly, powder spray is excellent for dark materials. It enhances light reflection, allowing your scanner to capture more detail. To apply, make sure the object is clean, then spray lightly from a distance to cover the surface evenly. This simple step helps ensure that your scanning results are both reliable and precise.
Anti-Reflective Coating for Optimal Results
Applying an anti-reflective coating is another effective technique. This coating reduces glare and improves light absorption, making it easier for the scanner to record accurate data. It’s particularly useful for glass or highly polished metals. By incorporating this step, you can reduce errors and improve the overall quality of your 3D scans. The sooner you apply this technique, the faster you’ll achieve more accurate scans.
Cross-Polarization and Target Markers for Accuracy
For those aiming for the highest accuracy, cross-polarization and target markers are essential tools. Cross-polarization involves using filters to reduce reflections, and target markers help in maintaining alignment throughout the scan. These techniques are particularly beneficial for complex shapes or highly reflective materials. Here’s a pattern break: most people think simple scanning is enough, but the added precision from cross-polarization and markers can make a big difference in challenging projects.
Choosing the Right 3D Scanning Technology
Selecting the appropriate 3D scanning technology can further enhance the quality of your projects. Different technologies offer unique benefits, and understanding them is key.
Benefits of Structured Light and Laser Scanning
Structured light and laser scanning each have their advantages. Structured light is excellent for capturing detailed textures and is faster. Laser scanning, on the other hand, is unmatched in precision and is ideal for industrial applications. Both methods can achieve high accuracy, but the choice depends on your specific needs. Here’s the key insight: knowing the strengths of each method helps you decide which technology best suits your project.
Artec Leo, Artec Ray II, and ScanTech SimScan E Explained
The Artec Leo, Artec Ray II, and ScanTech SimScan E represent cutting-edge technology in the field of 3D scanning. The Artec Leo is known for its portability and ease of use, making it ideal for on-the-go scanning. The Artec Ray II provides high precision for large-scale objects, while the ScanTech SimScan E excels in capturing intricate details. Each scanner offers unique features that cater to different project requirements. By understanding these tools, you can better match the scanner to your specific application.
Ensuring Point Cloud Quality and Mesh Accuracy
Ultimately, the goal of any 3D scanning project is to produce high-quality data. Ensuring point cloud quality and mesh accuracy starts with choosing the right technology and preparation techniques. By combining the best methods, you ensure that your digital models are both accurate and reliable. A common belief is that any scanner will do, but investing in the right technology and preparation yields the best results.
In conclusion, understanding and addressing the impact of surface texture and reflectivity can greatly enhance your 3D scanning accuracy. By implementing the right preparation techniques and choosing appropriate scanning technology, you set the stage for successful, metrology-grade scans. This knowledge empowers you to tackle even the most challenging scanning projects with confidence and precision.